What are Users & Roles?
Users are people who can access your PesaSwap account. Roles control what each user can do.Business Profile
Default Profile
When you create a PesaSwap account, you get a default business profile automatically. This is where your payments are processed.User Roles
Organization Admin
Full Control - Can do everything in PesaSwap- Add/remove users
- Create merchant accounts
- Manage all payments
- Access all reports
- Change all settings
Merchant Admin
Merchant Control - Can manage one merchant account- Add users to their merchant
- Manage payments for their merchant
- View reports for their merchant
- Configure payment methods
User
Basic Access - Can only do specific tasks- Process payments (if allowed)
- View payments (if allowed)
- Cannot change settings
- Cannot add other users
How to Invite a User
Step 1: Go to Users Section
- Login to PesaSwap dashboard
- Click Settings
- Click Users & Roles
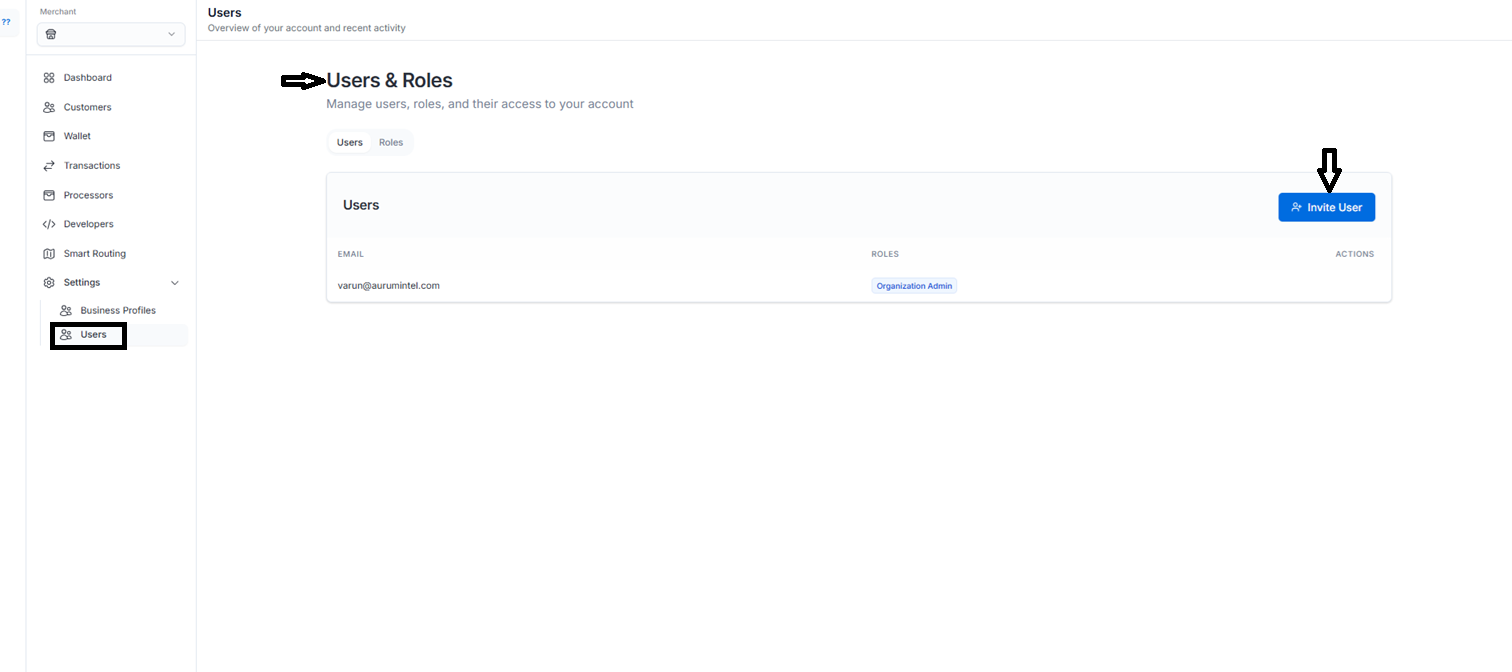
Step 2: Invite User
- Click Invite User button
- Enter email address
- Choose role (Admin or User)
- Click Send Invite
Step 3: User Joins
- User receives email invitation
- User clicks link and creates password
- User can now access PesaSwap
User Table
| Role | Status | Actions | |
|---|---|---|---|
| admin@business.com | Organization Admin | Active | Edit, Remove |
| manager@business.com | Merchant Admin | Active | Edit, Remove |
| staff@business.com | User | Active | Edit, Remove |
What Each Role Can Do
Organization Admin Can:
- Everything
- Add/remove users
- Create merchant accounts
- Access all payments and reports
- Change all settings
Merchant Admin Can:
- Manage their merchant account
- Add users to their merchant
- Process payments
- View reports for their merchant
- Cannot access other merchants
User Can:
- Process payments (if given permission)
- View payments (if given permission)
- Cannot add users
- Cannot change settings
- Cannot access reports (unless given permission)
Managing Users
Change User Role
- Go to Users & Roles
- Find the user in the table
- Click Edit in Actions column
- Select new role
- Click Save
Remove User Access
- Go to Users & Roles
- Find the user in the table
- Click Remove in Actions column
- Confirm removal
Give Specific Permissions
When inviting or editing a user, you can give them specific permissions:- View Payments: Can see payment transactions
- Create Payments: Can process new payments
- Refund Payments: Can process refunds
- View Reports: Can access financial reports
Example: Adding a Cashier
Scenario: You want to add a cashier who can only process payments Steps:- Click Invite User
- Email:
cashier@yourstore.com - Role: User
- Permissions: Select only Create Payments
- Click Send Invite
Security
Password Requirements
- Minimum 8 characters
- Include numbers and special characters
- Cannot reuse last 3 passwords
Two-Factor Authentication (2FA)
- Required for Organization Admins
- Recommended for all users
- Use SMS or Google Authenticator
Session Security
- Automatic logout after 4 hours of inactivity
- Maximum 3 active sessions per user
- Admins can force logout any user
Advanced Roles (For Admins & Developers)
Getting Help
Need help with users and roles?- Email: info@pesaswap.io